Although Antivirus suites including MS Security Essentials, Avira, Avast, Norton AntiVirus etc., help us protect the system from malwares, viruses, spywares, keyloggers and other like potentially harmful programs, sometimes malware infected applications manage to slip through deployed antivirus securitycracks and attack the system booting process. In such a case, anti-virus suites can’t identify and remove the infected application/processes unless the you repair the infected system boot sectors, and then boot into Windows to perform the virus removal operation over entire disk. In this post, we will show you how to clean your system from viruses when you can not boot into Windows.
Using SARDU (Shardana Antivirus Rescue Disk Utility)
When it comes to fixing system issues and scanning hard disks for viruses without booting the OS,SARDU offers a simple, yet powerful environment to perform numerous system repair operations. For those who aren’t familiar with SARDU, it can burn a number of bootable anti-virus suites, system repair utilities and Live Operating Systems on a single USB/CD, letting users perform all the essential operations to fix the issues. Since SARDU has been specifically designed to scan the system for viruses and identify OS boot up issues, you can use it to burn your favorite anti-virus rescue disk (if available) to USB, and then boot it to thoroughly scan the system for viruses and malwares. To begin, create a SARDU disk by following the steps mentioned here. it must be noted that you can choose to add multiple anti-virus utilities to your USB.
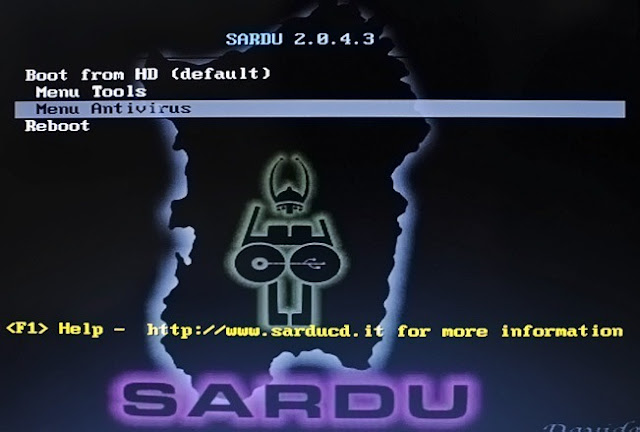
Once bootable antivirus utilities are burnt, plug-in the disk into virus infected PC, and open BIOS menu. Now, set External USB/Hard Disk as first boot option and reboot the system after saving changes made to BIOS. It will open SARDU boot menu, containing the selected anti-virus and system repair utilities. If you, for instance, chose to select AVG rescue disk while making SARDU bootable USB, navigate to Menu Antivirus, and then select Boot from AVG.
It will start loading AVG boot disk, and take you to AVG boot menu. Now, select AVG Rescue CD for performing virus scan operations.
When you select the AVG Rescue option, it will start mounting all the partitions. Once done, you will see the main menu, containing options to perform on-demand system scan, view previous scan results, configure anti-virus options and download essential update, run scripts for fixing known issues, changevirus database and so on. To perform the virus scan operation, navigate to Scan option, and hit Enter,
It will ask you to select either the volumes or specific directories within the mounted partitions to scan. We recommend selecting all the hard disk partitions in order to find the viruses and malwares. When volumes are selected, it will present the scanning options including scan inside archives, report password protected files, report archive bombs, use heuristics for scanning, scan cookies, recognize hidden extensions etc. To include additional scanning operations, navigate to the option you want to enable and hit Spacebar.
Once done, hit Enter to start the scanning the specified mounted volumes.
Hopefully, after following above steps, you will be able to completely remove system boot viruses and malware from the PC. If none of above methods work out for you, we recommend using Hiren’s Boot CD to perform boot-sector virus removal operations. You can check out this article to learn more about Hiren’s Boot CD.


0 comments:
Post a Comment